
Product documentation
In this topic the procedure to process bulk anonymization, bulk randomization and bulk delete operations will be explained.
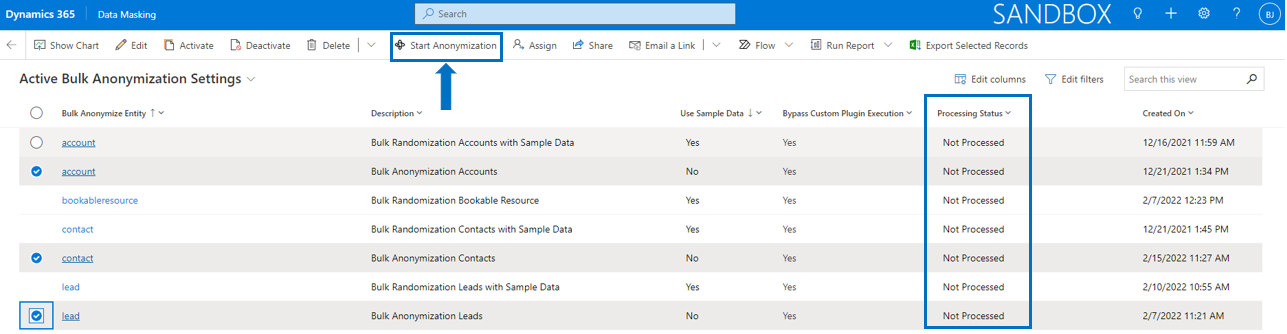
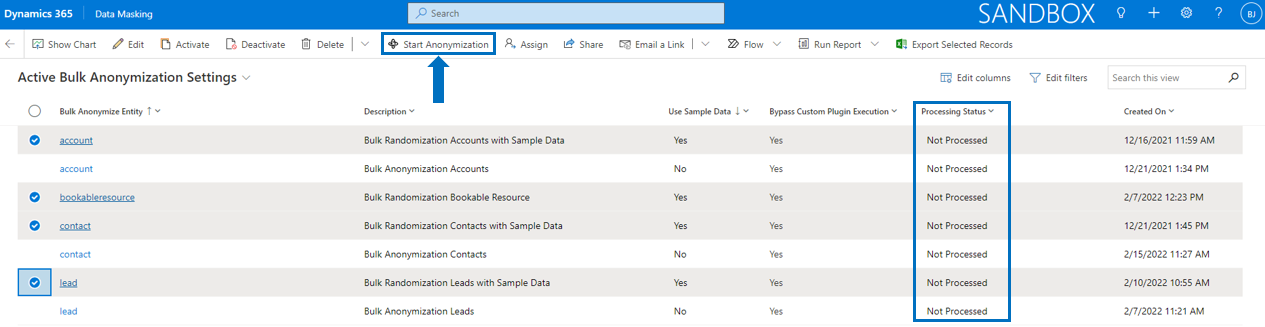
When bulk anonymization settings are defined for specific entities, the settings records can be processed by selecting them and using the ribbon bar button Start Anonymization. When bulk anonymization has not been triggered yet, the Processing Status wil be Not Processed.
Note that it is required to have the security role Data Masking - Administrator in order to be able the start the bulk anonymization and be aware that this process is irreversible.
When the button Start Anonymization has been selected, a check is performed if the current environment is a production environment or not. Only in case of a sandbox environment, the bulk anonymization process will continue.

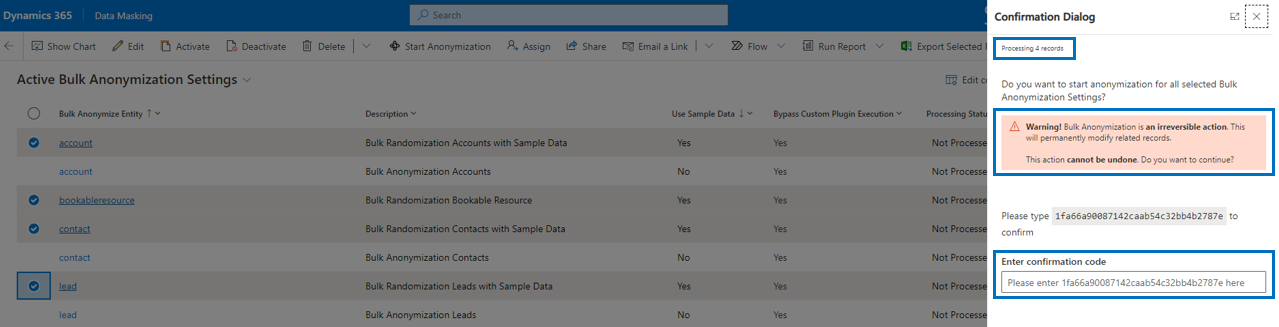
When the environment is checked and confirmed as being a sandbox, the following confirmation dialog is presented with the number of bulk anonymization settings records to be processed, a clear warning message about what is going to happen and a required confirmation code that need to be entered by the system administrator.
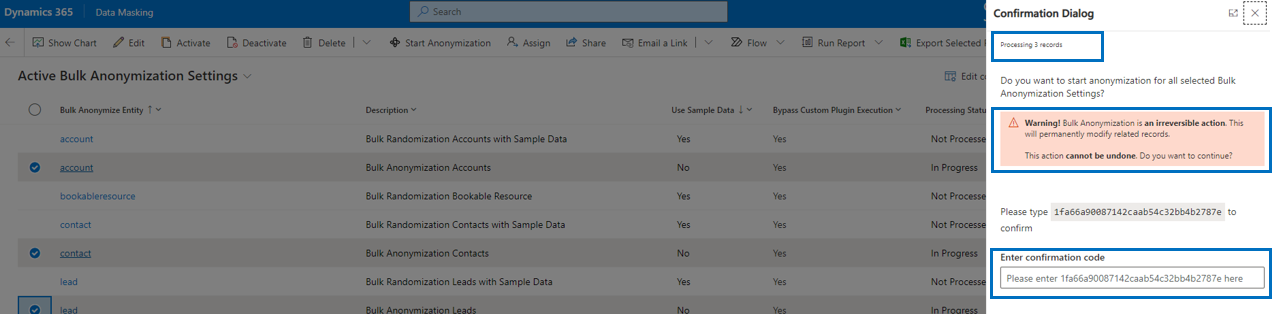
When the confirmation code has been entered, select the button OK which will trigger the Bulk Anonymization started dialog.
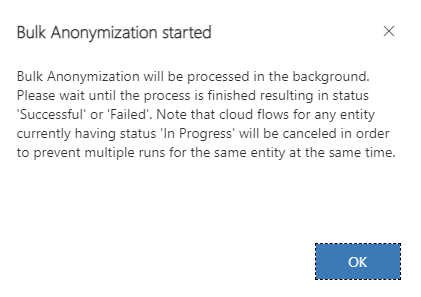
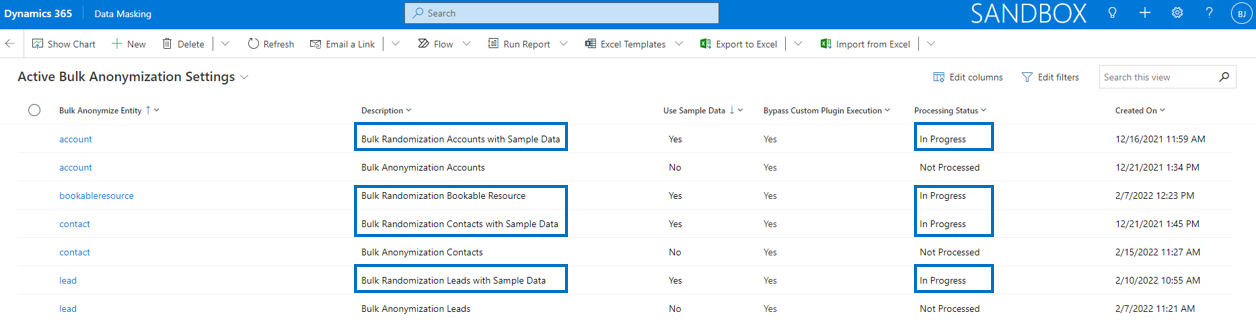
Wait a few moments for the cloud flows to start, refresh the view and notice that the Processing Status of the selected records will change into In Progress.
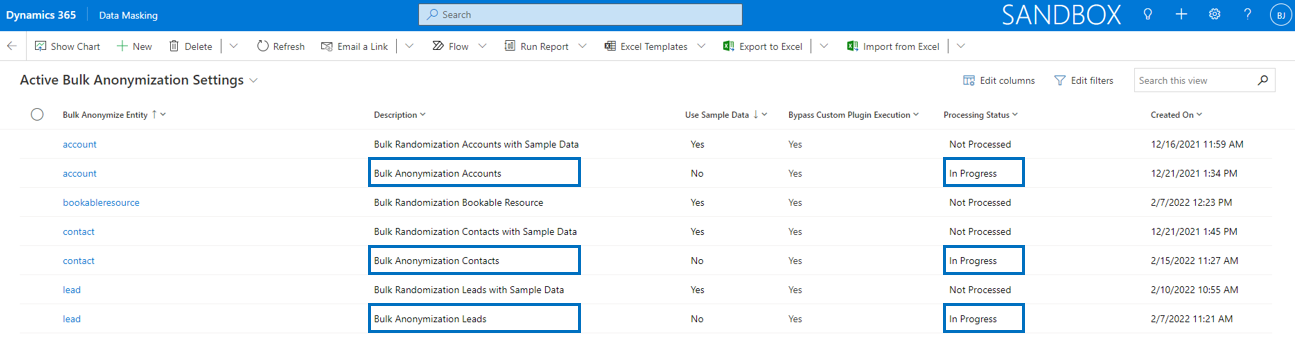
Depending on the number of records that need to be processed for each bulk anonymization setting, it could take a while before the bulk anonymization will be finished. One can imagine that processing 5.000 contacts will go faster than processing 100.000 contacts, with larger number of records it is a matter of patience until the process is finished.
In one of our stress test simulations we have processed over 200.000 Accounts in bulk and the process finished successfully within 18 hours.

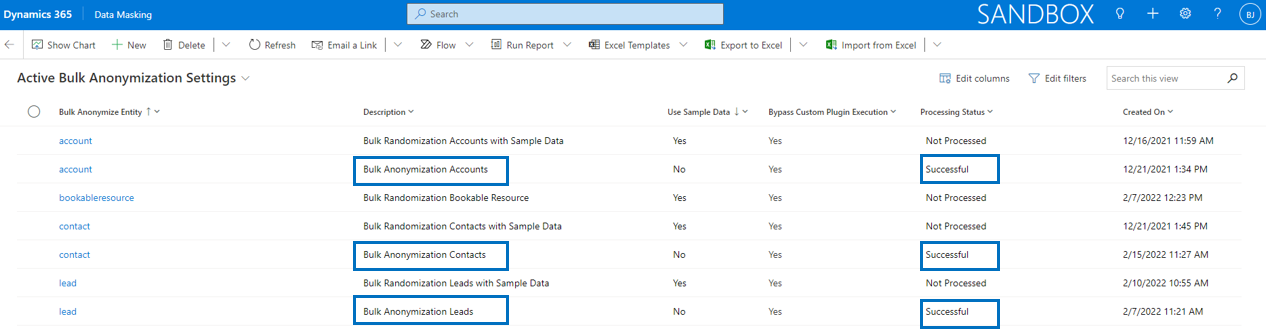
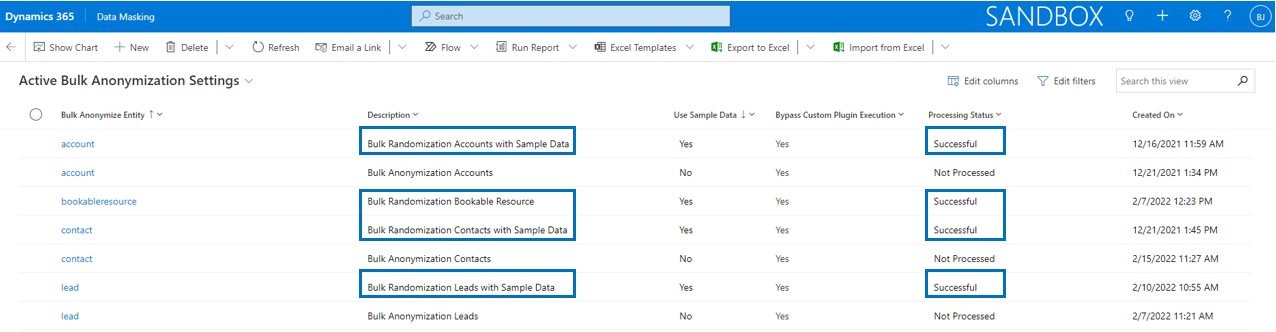
When the process is finished notice that the Processing Status of the selected records has been changed into Successful.
And the corresponding cloud flows will show status Succeeded.

Important
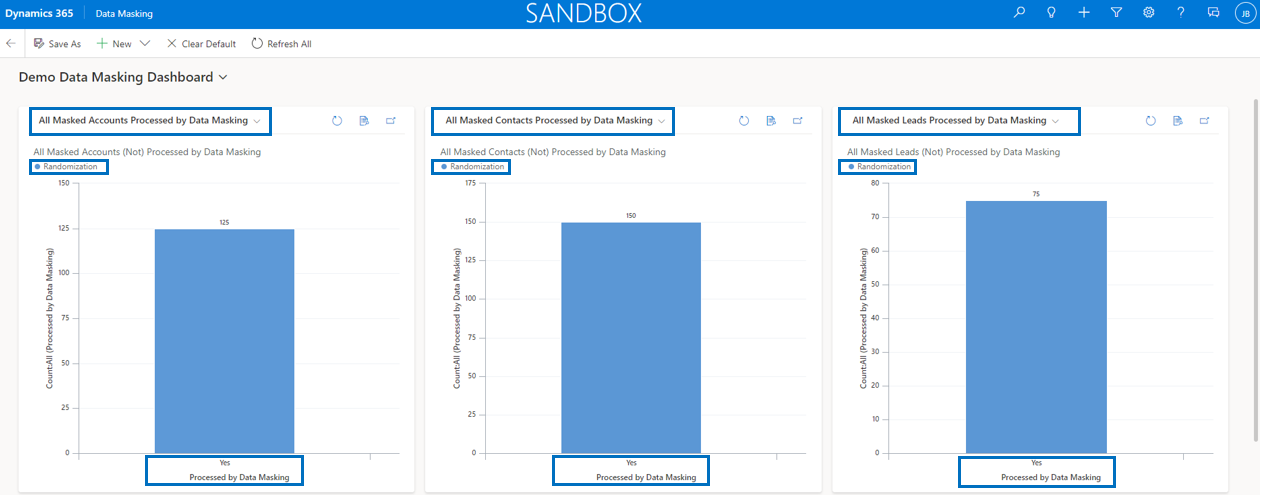
When bulk anonymization has been finished, you can check the results via the Data Masking Dashboard. Out of the box there are charts for entity Account, Contact and Lead which show the number of records Processed by Data Masking and its Data Masking Processing Type.
Note that you have to define the correct values of these two fields in the setting values of the respective entity that is masked.
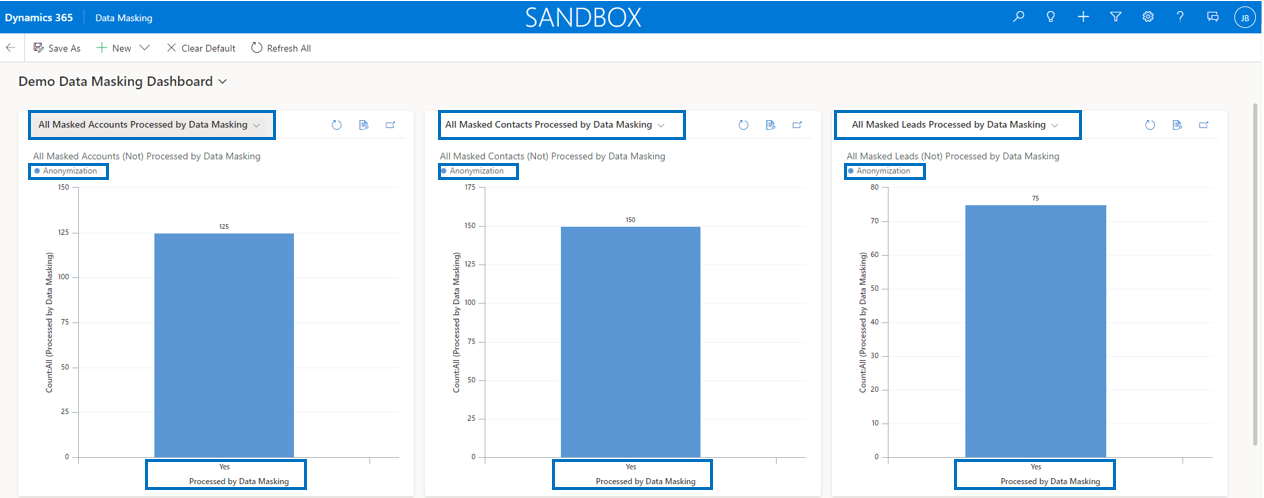
Further, for entity Account, Contact and Lead two new views have been added in order to show All Accounts, Contacts, Leads Processed by Data Masking and All Accounts, Contacts, Leads Not Processed by Data Masking.
In the screenshot below you can see that the fields of in this example entity Contact are anonymized with unrecognizable data.

When bulk randomization settings are defined for specific entities, the settings records can be processed by selecting them and using the ribbon bar button Start Anonymization. When bulk randomization has not been triggered yet, the Processing Status wil be Not Processed.
Note that it is required to have the security role Data Masking - Administrator in order to be able the start the bulk randomization and be aware that this process is irreversible.
When the button Start Anonymization has been selected, a check is performed if the current environment is a production environment or not. Only in case of a sandbox environment, the bulk randomization process will continue.
When the environment is checked and confirmed as being a sandbox, the following confirmation dialog is presented with the number of bulk randomization settings records to be processed, a clear warning message about what is going to happen and a required confirmation code that need to be entered by the system administrator.
When the confirmation code has been entered, select the button OK which will trigger the Bulk Anonymization started dialog.
Wait a few moments for the cloud flows to start, refresh the view and notice that the Processing Status of the selected records will change into In Progress.
Depending on the number of records that need to be processed for each bulk randomization setting, it could take a while before the bulk randomization will be finished. One can imagine that processing 5.000 contacts will go faster than processing 100.000 contacts, with larger number of records it is a matter of patience until the process is finished.
In one of our stress test simulations we have processed over 200.000 Accounts in bulk and the process finished successfully within 18 hours.
When the process is finished notice that the Processing Status of the selected records has been changed into Successful.
And the corresponding cloud flows will show status Succeeded.

Important
When bulk randomization has been finished, you can check the results via the Data Masking Dashboard. Out of the box there are charts for entity Account, Contact and Lead which show the number of records Processed by Data Masking and its Data Masking Processing Type.
Note that you have to define the correct values of these two fields in the setting values of the respective entity that is masked.
Further, for entity Account, Contact and Lead two new views have been added in order to show All Accounts, Contacts, Leads Processed by Data Masking and All Accounts, Contacts, Leads Not Processed by Data Masking.
In the screenshot below you can see that the fields of in this example entity Contact are randomized with readable but fake sample data.

Via the Data Masking settings it can be defined which bulk deletion operations should be triggered. Currently there are three bulk delete operations: Bulk Delete Audit History, Bulk Delete Notes and Bulk Delete Posts. Deleting audit history will clear all audit log files, deleting notes and posts will delete all records in entity Notes and Posts. All three operations are triggered by a cloud flow and executed via a Bulk Deletion System Job.
Note that it is required to have the security role Data Masking - Administrator in order to be able the start the bulk deletion operation(s) and be aware that this process is irreversible.
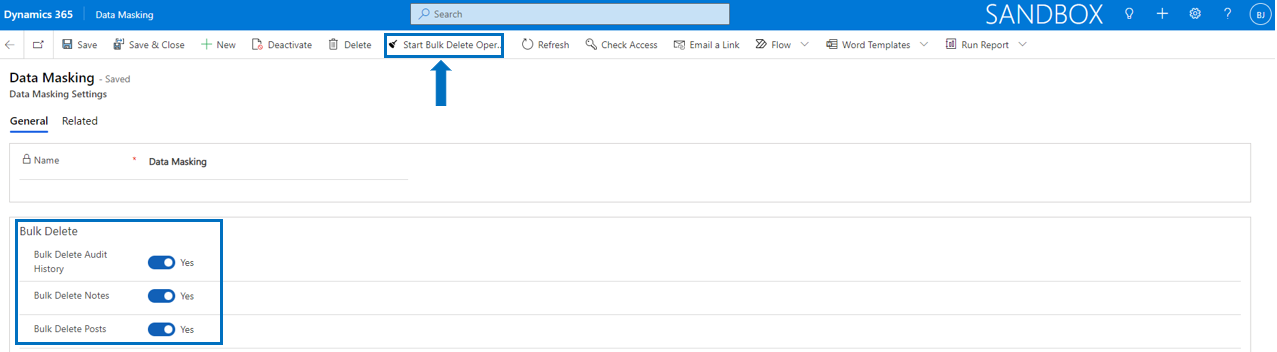
When the button Start Bulk Delete Operation(s) has been selected, a check is performed if the current environment is a production environment or not. Only in case of a sandbox environment, the bulk deletion process will continue.
When the environment is checked and confirmed as being a sandbox, the following confirmation dialog is presented a clear warning message about what is going to happen and a required confirmation code that need to be entered by the system administrator.
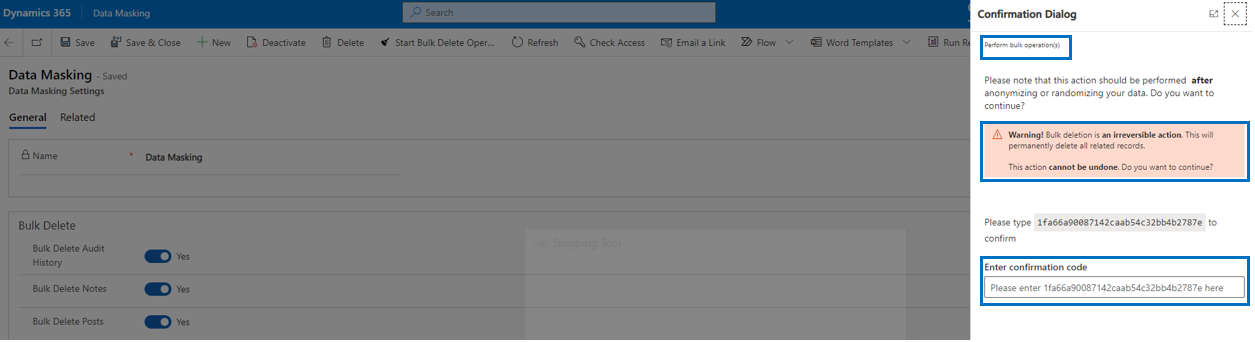
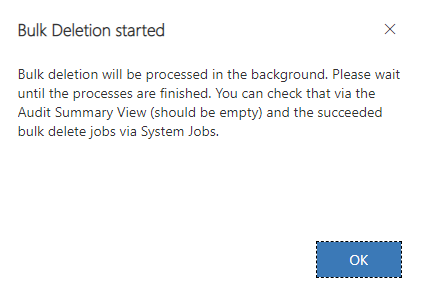
When the confirmation code has been entered, select the button OK which will trigger the Bulk Deletion started dialog.
Depending on the number of records that need to be processed for each bulk deletion, it could take a while before the bulk deletion operation(s) will be finished.
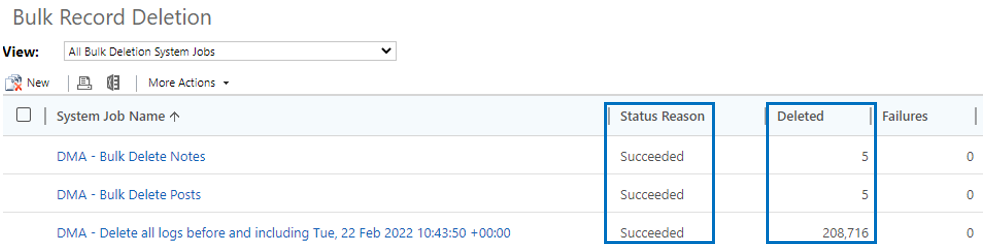
The corresponding cloud flow will show status Succeeded.

Via the Power Platform Admin Center you can check if the bulk deletion system jobs have been executed successfully. Go to your environment, select Settings in the ribbon bar, followed by Audit and Logs and option System Jobs.
If you use the Classic View via Advanced Settings, go to Data Management and Bulk Record Deletion and type DMA in the top right corner search for records section.
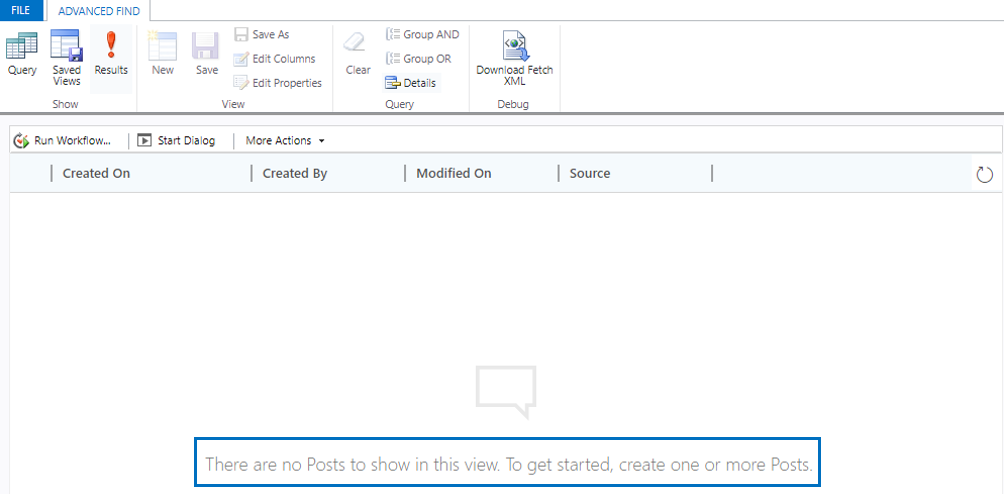
When the bulk deletion operations were succesfull, the Audit Summary View should be empty.

When the bulk deletion operations were succesfull, the entity Notes should not contain any records.
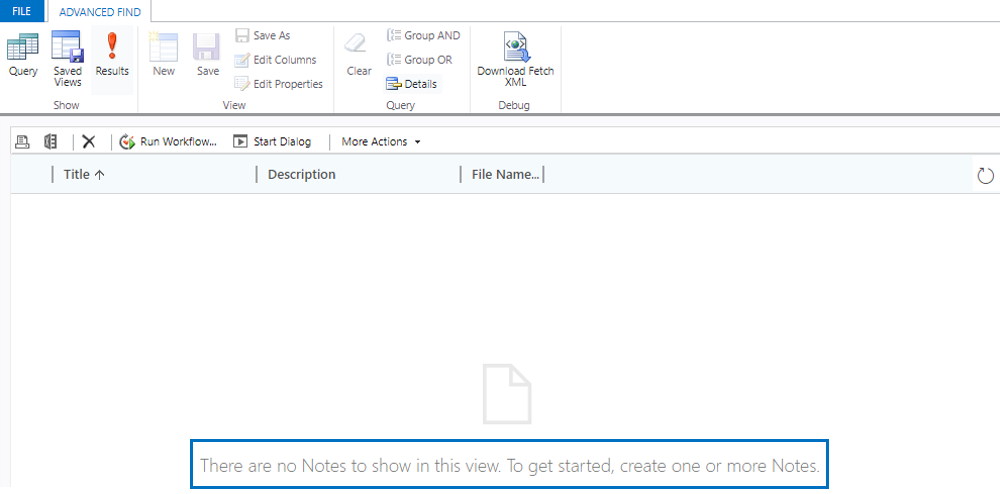
When the bulk deletion operations were succesfull, the entity Posts should not contain any records.
If parameter Enable Process Notifications is set to Yes in Data Masking Settings, the system administrator will be informed by an in-app notification when a bulk anonymization or bulk randomization process has started. The notification will 'toast' for a couple of seconds and the number of unread notifications are visible via the notification icon.

When a bulk process is finished a 'completion' notification will be triggered as well. This way the system administrator is informed without having to check if the cloud flow has run successfully

For the reason of speed and efficiency it is advised to define the bulk anonymization settings and the sample data in your production environment. This way after copying the production database, your system administrator is immediately ready to start the bulk masking processes in the sandbox, without having to define the settings first.
Important
If by any chance our Data Masking security roles are attached to users and system administrators in a production environment, they will see the ribbon buttons Start Anonymization and Start Bulk Delete Operation(s) in the Bulk Anonymization Settings and Data Masking Settings.

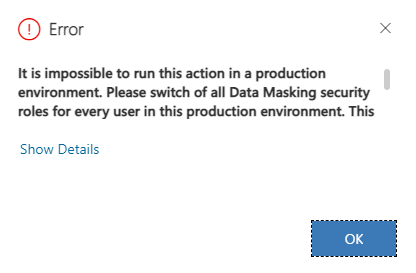
If by any chance the button Start Anonymization or Start Bulk Delete Operation(s) has been selected, a check is performed if the current environment is a production environment or not. Only in case of a sandbox environment, the process will continue.

If by any chance these buttons are used in a production enviroment, an error message will be thrown and the process will directly be aborted.
Important
Important